Laying out a room can feel overwhelming when you’re staring at a blank canvas—but with Personal Architect Online, the process is simple, visual, and even fun. Whether you’re refreshing a living room, reworking a home office, or planning a new addition, our easy-to-use tools help you turn ideas into a realistic 3D space.
Watch the video below to see a real-time transformation, then follow along with our key tips to start your own design.
📽️ Watch the video below or on YouTube
Step 1: Set the Room Dimensions
Anytime you begin a design, start with the basics. Draw the perimeter of your room with accurate dimensions. If you’re working from a floor plan or existing room, adjust measurements to match your space exactly.
Pro Tip: In Personal Architect Online click a dimensions to change it. The value will highlight and arrows will appear. Type a new value and the walls will move in the direction of the dark arrow to accomodate the new dimension. Click the alternate arrow to move the dimensions in the opposite way.
Step 2: Add Doors and Windows
Add doors and windows to your floor plan early in the design process. Establishing these fixed architectural elements first is essential—they dictate natural traffic flow, light sources, and structural constraints. With these in place, you can confidently arrange furniture and décor, knowing your layout aligns with the realities of the space.
Pro Tip: If you are a Pro User, you can create any window and door size you need on the fly with the Product Factory. Use the 3D view as you go to instantly see how natural light flows into the space.
Step 3: Furnish the Space
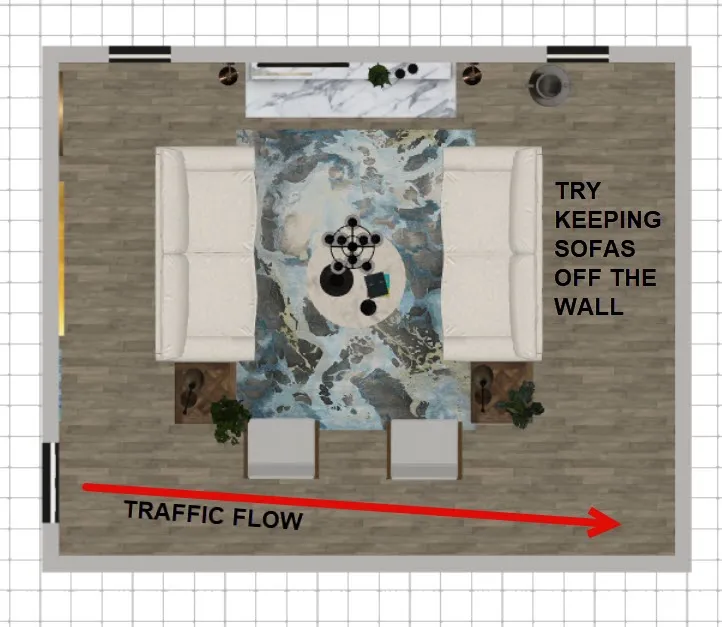
First, place the largest items —like sofas, beds, or dining tables. These foundational pieces set the tone and orientation for the rest of the room. As a rule leave at least 30–36 inches for walkways around furniture. Avoid blocking doorways, windows, or natural paths through the room.
 Furniture Placement
Next, think about function. In living rooms, arrange seating so people can comfortably talk without shouting or craning their necks—ideally 6 to 10 feet apart for face-to-face interaction. Also, distribute furniture evenly so one side of the room doesn’t feel heavier than the other. Finally, to make the room look professionally put together, pull furniture away from walls if space allows. Floating arrangements can make a room feel more inviting and dynamic.
Pro Tip: Mix furniture styles and finishes. Browse the library of furniture in Personal Architect, and drag items into place. Move pieces around, rotate them, or swap them out to test different layouts and styles.
Step 4: Add Décor
Choose décor that fits your space—not too small to feel lost, not too large to overwhelm. Test proportions using 3D software like Personal Architect Online to visualize before buying.
Create layers of interest by mixing materials like wood, metal, linen, wool, and glass to add depth and warmth. Textured pillows, throws, and rugs can transform a space from flat to inviting. Also, add art. Large-scale artwork or a gallery wall above a sofa creates a focal point. Choose art that speaks to your personality or the room’s vibe.
To personalize the space, use items that tell your story: travel souvenirs, family photos, vintage finds, or handmade pieces. These personal touches give your living room soul.
In addition, don’t forget plants. Plants (real or high-quality faux) soften hard edges, purify the air, and bring a natural element that instantly makes a room feel more welcoming.
Finally, to make it all work, leave breathing room. A few well-chosen pieces are more effective than cluttered shelves or surfaces. Let your décor speak without shouting.
Step 5: Experiment with Finishes
The items that you have selected cement your color scheme (3–5 colors) that reflects the mood you want: calm and neutral, bold and dramatic, or soft and cozy. This classic interior design formula helps balance colors: 10% accent color (pillows, art, accessories), 60% dominant color (walls, large furniture), 30% secondary color (rugs, curtains). Even in bold schemes, neutrals provide balance. Use white, gray, tan, or black to ground your palette and make brighter hues pop.
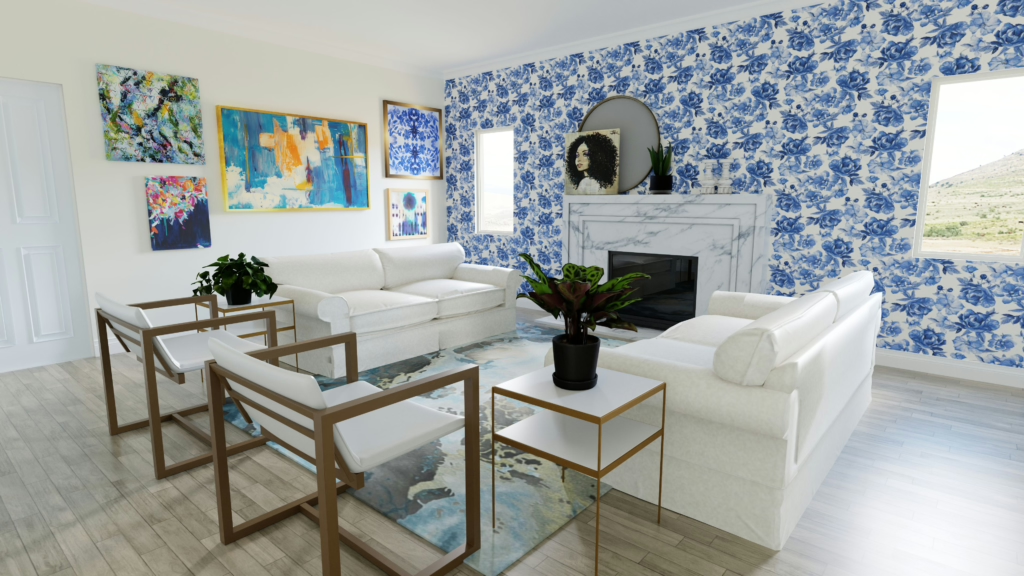
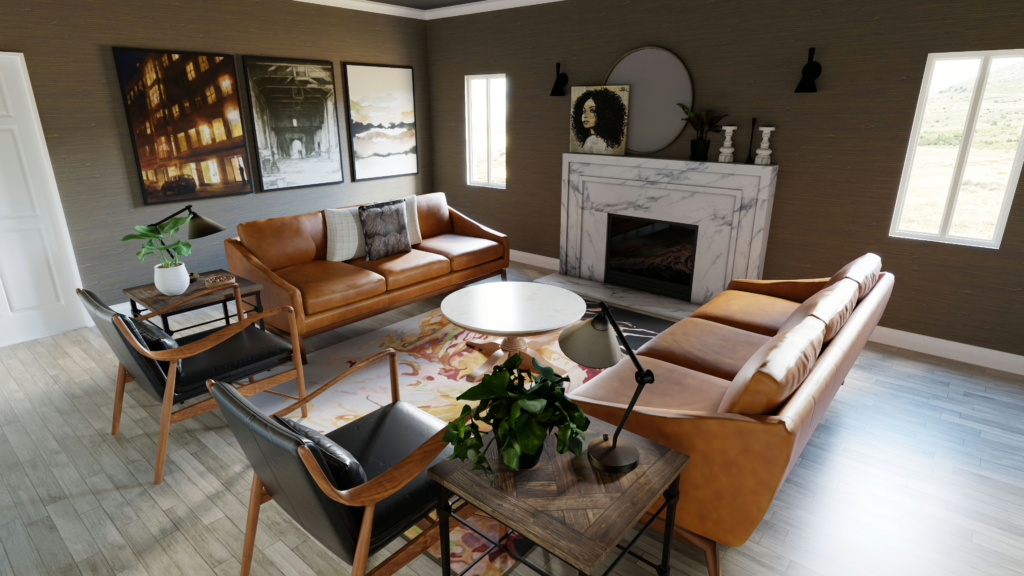
Explore coordinated palettes in Personal Architect Online to quickly test color combinations in a virtual 3D model.Try out different flooring, and wall finishes – paint and wallpaper. One of the advantages of designing in 3D is the ability to visually test multiple combinations without any commitment—what once took hours with swatches now takes seconds.
Step 6: Layer the Lighting
Natural and artificial lighting can change how colors appear. They also add mood to a space – layer the lighting for the different tasks in the room. Add a lamp where you will read, Add wall sconces to highlight art. Use overhead lights to lighten a space.
Why Use Personal Architect Online?
Switch to 3D view or use the virtual walkthrough mode to get a real feel for the space. You’ll instantly see if the layout flows well, if furniture is too tight, or if a color just doesn’t work. Make changes as needed—no mess, no stress.This platform is designed for homeowners and interior design enthusiasts who want a powerful yet approachable design tool. It’s online, intuitive, and lets you see what your ideas really look like before making real-world decisions.
Start Your Design Today
Ready to try it yourself? Sign up for a free trial of Personal Architect Online and begin laying out your dream space today. You’ll be amazed at how easy it is to turn ideas into beautiful, workable rooms—no design experience required.
👉 Try Personal Architect Online
