You’ve created your design. You’ve selected the finishes, arranged the furniture, and found the perfect views of the space. But how do you turn your 3D design into something polished that you can print and present to a client? You create printable presentation sheets.
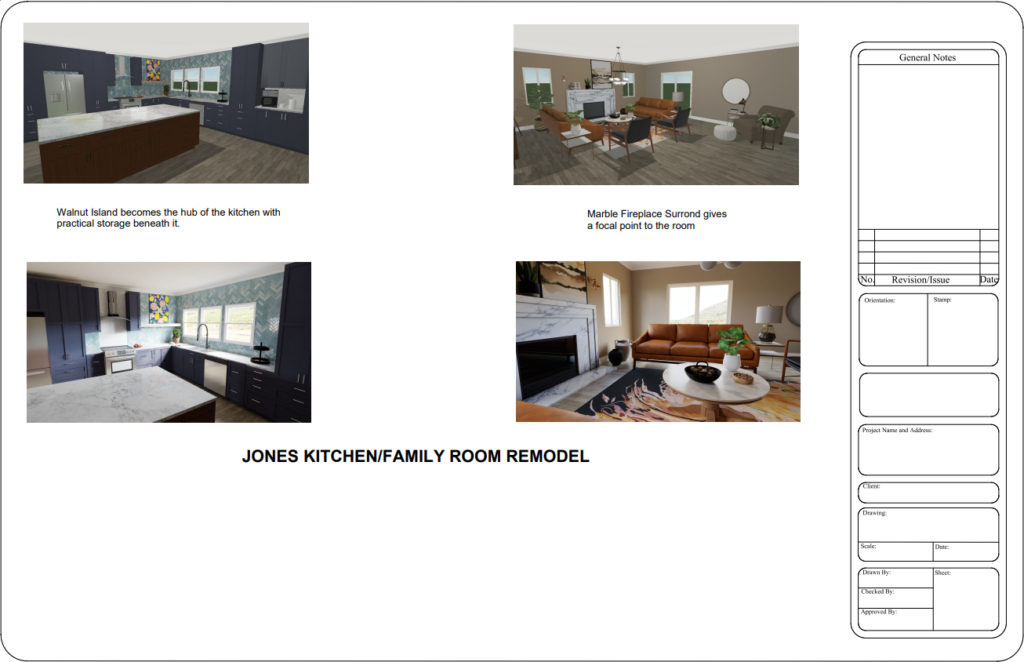
With Personal Architect Online, you can create printable presentation sheets that combine multiple project views, rendered images, and project notes into one professional document.
Presentation sheets are ideal for designers, remodelers, kitchen and bath professionals, builders, and homeowners who want to communicate a design clearly without asking someone to navigate through the entire 3D model.
Watch the tutorial: How to Create Printable Presentation Sheets in Personal Architect Online YouTube
What is a design presentation sheet?
A design presentation sheet is a printable page that organizes selected project views into one easy-to-understand document.
Instead of sending several individual screenshots or asking a client to open the design in Personal Architect Online, you can assemble the most important views together on a single sheet.
For example, a kitchen presentation might include a view of the island, cabinetry wall, adjoining dining area, and an overall room perspective. A designer can then add notes to explain finishes, selections, or other important project details.
The result is a presentation that is easier to review, discuss, print, and share.
Why should designers create presentation sheets?
Clients often understand a design much more easily when they can see several perspectives together.
A floor plan alone may show the layout, but it does not always communicate how a space will feel. A 3D view provides that visual context.
Combining several views on a presentation sheet helps answer questions such as:
What will the finished room look like?
How do the different areas of the design relate to one another?
What will someone see when they enter the room?
How will the cabinetry, furniture, finishes, and architectural elements work together?
Personal Architect Online is designed around interactive 2D and 3D visualization, allowing users to explore a project visually before it is built. Personal Architect
How Do You Create a Printable Presentation Sheet in Personal Architect Online?
Start in your Personal Architect Online project.
Step 1: Open the Project You Want to Present
Open the project you want to present.
Before creating your sheet, spend a few minutes navigating through the design in 3D.
Think about the story you want the presentation sheet to tell.
If you were presenting this project to a homeowner for the first time, which views would help them understand the design immediately?
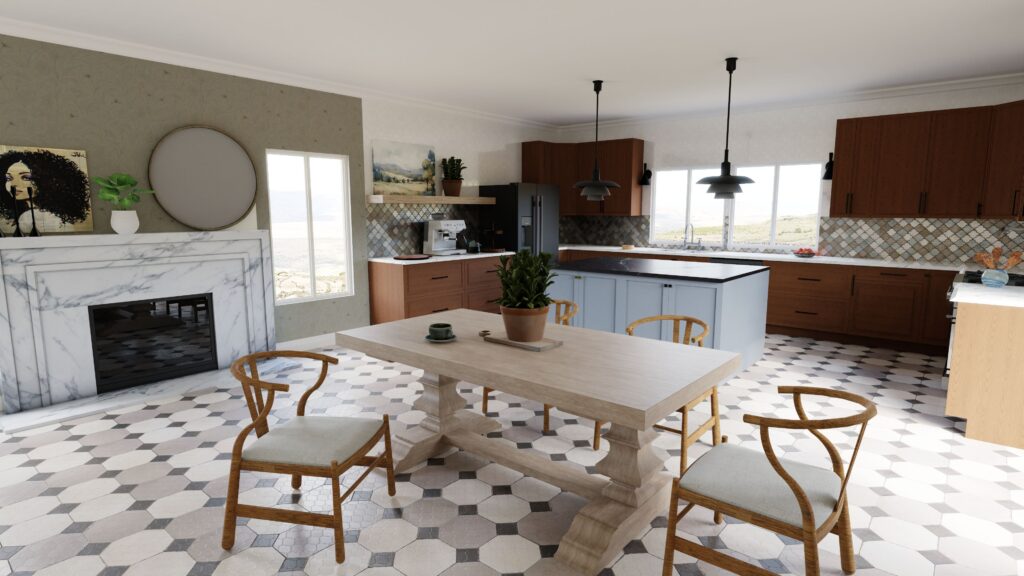
For a kitchen, that might include the island, appliance wall, cabinetry, and an overall view showing how the kitchen connects with surrounding spaces.


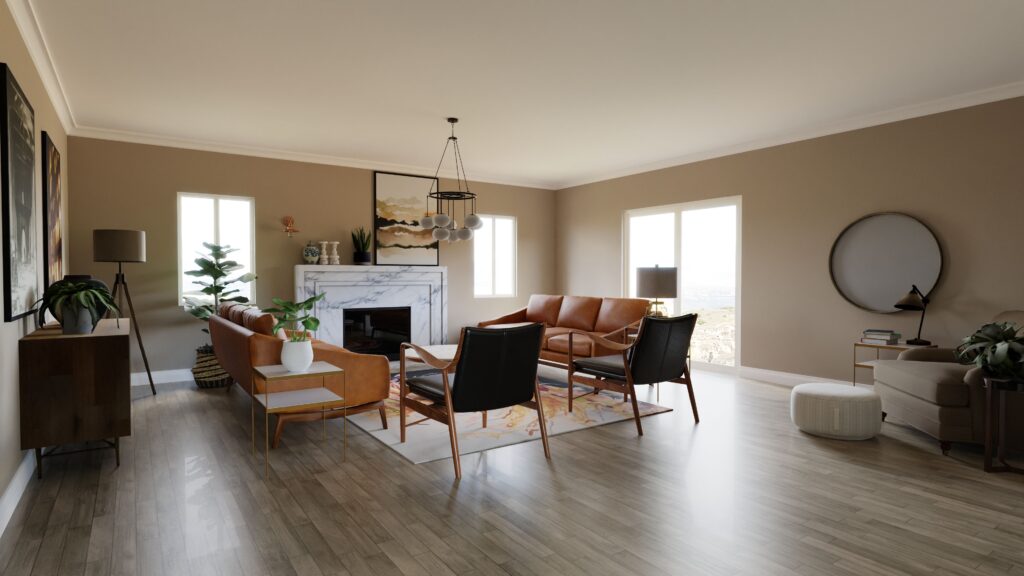
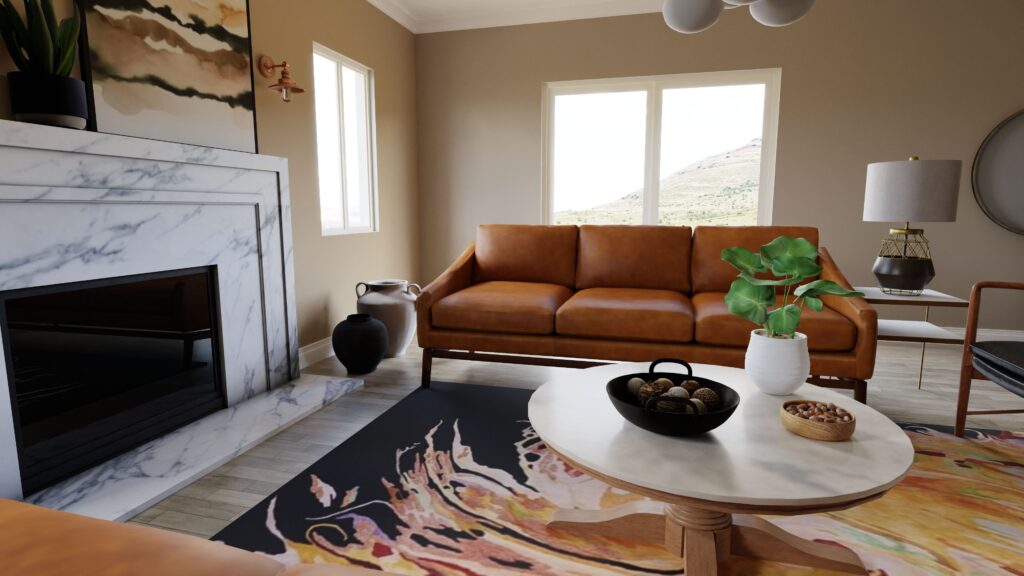
For a whole-room design, you might choose views that show furniture placement, focal points, circulation, and finishes.
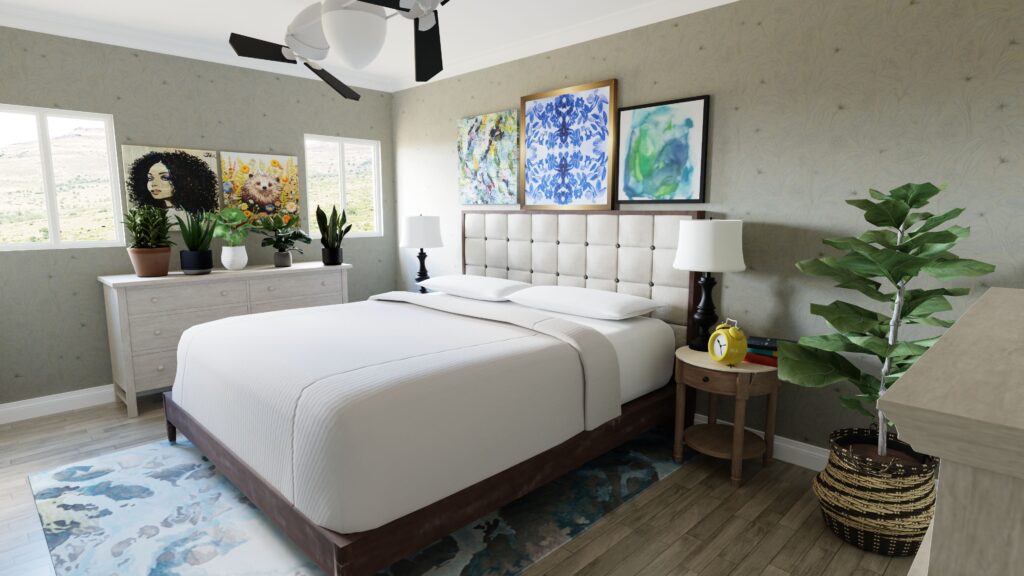

Step 2: Position Your Camera for the Best Views
(See Lesson on How to Create Camera Views: https://youtu.be/9PvCk-F1YZk)
Navigate through the model and position the camera for each presentation view.
You do not necessarily need dozens of images.
A few carefully chosen views will usually communicate the project more effectively than a large collection of similar screenshots.
Try to select views that answer different questions about the room.
One view might demonstrate the overall layout, while another highlights cabinetry or a feature wall.
Another might illustrate the relationship between two adjoining spaces.
What makes a good 3D presentation view?
A strong presentation view should immediately help the viewer understand something about the design.
Avoid positioning the camera too close to objects or selecting several nearly identical angles.
Instead, ask:
Does this view clearly show the design decision I want the client to understand?
If yes, it is probably a useful presentation view.
Step 3: Create or Select Your Camera Views
Personal Architect Online lets you work with saved camera views that you can later incorporate into your presentation.
As you move through your model, save the views that best represent your project.
This can also help during the design process because you can return to important viewpoints instead of recreating the same camera angle each time.
For example, you might save views called:
Kitchen Island
Living Room

Dining Area

Clearly defined views make it much easier to assemble your final presentation.
Step 4: Open the Presentation Sheet
Once your project views are ready, open the presentation sheet area.
Your printable sheet provides a page where you can assemble project imagery and information into a professional layout.
The presentation sheet shown in the tutorial includes a title block area along with space for your design content.
This lets the sheet function as more than a collection of screenshots—it becomes a project document you can save and present.
Step 5: Add Camera Views to Your Presentation Sheet
Your saved Camera Views are available from the presentation interface.
Select the views that you want to include and place them onto the sheet.
In the example shown in the video, several room perspectives are organized together so the viewer can quickly understand different areas of the project.
Think of your presentation sheet almost like a visual summary.
Someone should be able to look at it for a few seconds and understand the major design ideas.
How many images should you put on a presentation sheet?
There is no single correct number, but clarity is more important than quantity.
Four strong views may communicate a project better than ten small images.
Choose images that each provide something different.
A good presentation might include an overall room view, a major focal point, a secondary perspective, and a view demonstrating how the room connects to another space.
Step 6: Add Rendered Images
You can also incorporate rendered imagery into your presentation.
(See Lesson on How to Create Renderings: https://youtu.be/Egjj77bQ-Lc)
Rendered images are particularly useful when you want to communicate finishes, lighting, materials, cabinetry, or the overall atmosphere of the completed room.
This article gives stunning examples and step-by-step instructions: https://www.personalarch.com/posts/create-and-share-stunning-renderings/
Personal Architect Online’s visualization tools help users test materials, layouts, and design decisions visually, rather than relying only on sketches or imagination. Personal Architect
Step 7: Arrange the Images on the Page
Once your images are on the sheet, organize them into a clean layout.
Presentation design matters.
Try to align the images, keep spacing consistent, and avoid overcrowding the page.
Your largest or most impressive image can act as the primary view, while supporting images provide additional perspectives.
Should every presentation image be the same size?
Not necessarily.
Using one larger image can help establish a visual hierarchy.
The main image might show the overall design, while smaller images highlight specific areas.
The goal is to guide the viewer naturally through the project.
Step 8: Add Notes to Explain the Design
Presentation sheets do not have to rely solely on images.
You can add notes to provide additional context.
The tutorial demonstrates using the Note Editor to add text directly to the presentation.
Notes could identify important design elements, finishes, product selections, or instructions.
For example:
“Quartz countertop with waterfall edge.”
“Custom pantry storage located beside refrigerator.”
“Accent tile continues behind the cooking area.”
“Proposed furniture layout.”
The key is to keep the text concise.
The images should communicate most of the design, while the notes provide clarification.
Step 9: Review Your Presentation Sheet
Before creating the final document, look at the sheet from the perspective of the person receiving it.
Ask yourself:
Can someone understand the design without me explaining every image?
Are the most important views easy to identify?
Is there enough white space to keep the page from feeling cluttered?
Do the notes add useful information rather than repeating what is already obvious?
If the answer is yes, your presentation is ready.
Step 10: Download the Presentation as a PDF
When the presentation sheet is complete, download it as a PDF.
A PDF gives you a convenient document that can be printed, emailed, stored with project records, or shared with clients and other project stakeholders.
This is especially useful for professionals who want to combine the convenience of an interactive 3D design with a traditional project document.
Can Personal Architect Online Be Used for Client Presentations?
Yes.
Personal Architect Online can help clients explore and understand designs visually. The platform also supports design collaboration and interactive 3D experiences that you can share with clients and other project participants. Personal Architect
Printable presentation sheets complement that experience.
The interactive model lets clients explore.
The presentation sheet gives them a concise document they can reference afterward.
Using both can make design communication much clearer.
Are Presentation Sheets Useful for Kitchen and Bath Designers?
They can be particularly valuable for kitchen and bath projects because these designs involve many decisions that clients need to understand at once.
Cabinet configuration, countertops, backsplashes, appliances, fixtures, flooring, lighting, and furniture can all affect a room’s final look.
A presentation sheet lets you show several of those design decisions together.
Instead of asking a client to imagine how individual selections will work as a complete room, you can show them.
Can Presentation Sheets Help Reduce Design Revisions?
Clearer visualization can help clients understand design decisions earlier in the process.
When clients can see the relationship between layouts, finishes, products, and surrounding spaces, it’s easier for them to provide meaningful feedback before construction or ordering begins.
Personal Architect Online’s collaborative approach similarly uses interactive designs to improve communication and clarify client preferences earlier. Personal Architect
From 3D Design to Professional Presentation
Creating a great design is only part of the process.
The next challenge is communicating that design.
With printable presentation sheets in Personal Architect Online, you can take the views you have already created and organize them into a professional document that makes the project easier to understand.
Select your strongest camera views, add rendered images, organize the page, include helpful notes, and download your finished presentation as a PDF.
Your 3D model tells the complete story.
Your presentation sheet captures the highlights.
Ready to create your own project? Start designing with Personal Architect Online today.
Kitchen and Bath by Personal Architect
Try it on your next kitchen.
Snap a photo, get an editable 3D kitchen, and design it from there.
Try it on your next kitchen
